
4n6ir.com
Secret Archives of Execution Evidence: CCM_RecentlyUsedApps
by James Habben
I seem to be running into more and more systems that have Windows Prefetch disabled for one reason or another. It is especially frustrating for me as a consultant since I cannot make the changes necessary to enforce the creation of the trace files nor can I implement any kind of central logging. Without this digital forensic artifact, it becomes increasingly difficult to build out a timeline of events across all the systems involved in an incident response.
One of the evidence sources that has shown itself over and over comes from a connection with a Microsoft SCCM server. SCCM has the ability to collect inventory data from many sources, and tracking executables launching is one. This feature isn’t turned on by default to have the SCCM server collect this data; however, the logging occurs on the endpoints regardless of the settings that are configured on the server.
If you search for CCM_RecentlyUsedApps, you will find tons of articles about configuring SCCM to collect this data or how to perform queries to extract the collected data. If you have the ability to push this in your organization, I say do it! If you can’t, then read on so I can show you how to take advantage of this data anyways.
Data Source
The records holding the information behind CCM_RecentlyUsedApps are stored in the collection of files that make up the database behind WMI. The locations are consistent from Windows XP through Windows 10, and you will find them here:
- c:\windows\system32\wbem\repository\
- c:\windows\system32\wbem\repository\fs\
I have even seen some systems that have what appears to be an old version of the WMI database. It seems to roll like the Windows Registry controlset keys. When the rebuild process kicks off, a new version of the database is built and it does not carry the previous information with it. I have seen up to 003, but it would likely go further. The previous versions look like this:
- c:\windows\system32\wbem\repository.001\
- c:\windows\system32\wbem\repository.001\fs\
This specific artifact was a very critical piece in a previous case. It allowed us to narrow the time window of the compromise to be much more specific. Even a single day of exposure can make a big difference in the fines against the victim company during a PCI Forensic Investigation (PFI).
You will see a handful of files in these locations. They are all used to link all the various records together to properly parse these. The guys at FireEye did some work on reverse engineering this database and released a python script to extract all of the available classes and namespaces. You can find their tool here: https://github.com/fireeye/flare-wmi/tree/master/python-cim
Using this script, you can extract this data using these parameters:
- Namespace: root\ccm\SoftwareMeteringAgent
- Class: CCM_RecentlyUsedApps
This script was very helpful to me in a number of previous cases, although I have to mention that it is a bit of a pain to get installed properly. The other trouble that I ran into with this script, by no fault of the FireEye team, is that it can only parse the namespaces from the database if the data is not ‘corrupted’. I have found that imaging a live system can cause ‘corruption’ almost half of the time. It is frustrating to know that there are Indicator Of Compromise (IOC) hits inside that data blob, but the data won’t allow for the parsing.
Different Approach
As I manually looked over those seemingly lost IOC hits, I started to recognize patterns surrounding the hits. The fields holding all the property data seemed to be in the same order for all of the records of a certain system that I was reviewing at the time. I then pulled up a few systems with different OS’s from previous cases and found the same structure. YES!! The perfect setup for carving. Time to reverse engineer the record format.
The index uses a hash value in tracking and sorting structures that I won’t bore you with here. I mention though, because this hash is the piece that we will use to find these records. WinXP uses MD5 and newer uses SHA256. The hash in these records is generated from the class name CCM_RecentlyUsedApps, only the text needs to be upper cased as CCM_RECENTLYUSEDAPPS, and then converted to Unicode C\x00C\x00M\x00_\x00R\x00… (and you get the point).
- WinXP MD5: 6FA62F462BEF740F820D72D9250D743C
- WinVista+ SHA256: 7C261551B264D35E30A7FA29C75283DAE04BBA71DBE8F5E553F7AD381B406DD8
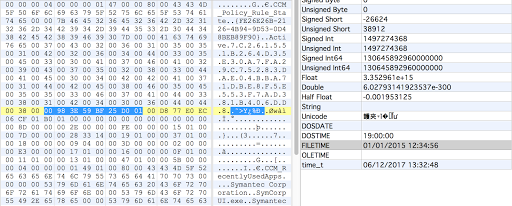
These hashes are what start the records. They are stored in Unicode themselves, for some reason. 128 bytes for the SHA256 and 64 bytes for the MD5.
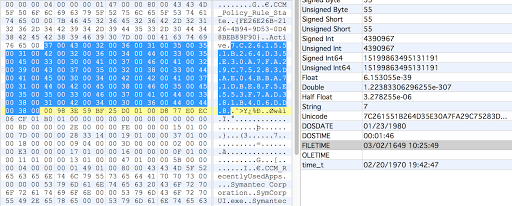
The next 16 bytes following the hash are two 8 byte FileTimes.
After that will be 2 bytes to tell you the size of the data portion of this record. I have not seen any records using more than 2 bytes and the max size of 2 bytes is either 65,535 unsigned or 32,767 signed. Either of those provide plenty of space for this data, so I wouldn’t expect it to expand for size purposes. The data portion of the record includes these 2 bytes.
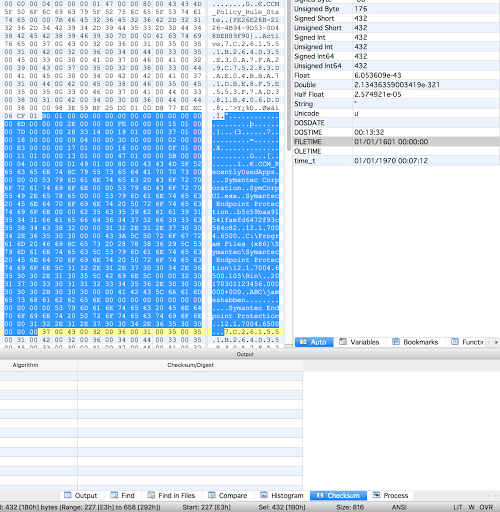
You can see on the right in the screenshot above that the size of the data is 432. You can then see at the bottom that I have highlighted 432 bytes (Sel 432 [1B0h]). You can also see another ‘7C261…’ starting immediately after my selection, although don’t let this fool you into thinking that these records will always be contiguous.
From here, the data is broken into 2 sections. The first section consists of various 4 byte fields with some being offsets and others being property values. The second section contains all the string based property values separated by double 0x00 bytes.
There are 3 values we can extract from the number section that are helpful.
- Filesize Offsets: Vista 178d (128+16+34), XP 114d (64+16+34)
- ProductLanguage Offsets: Vista 194d (128+16+50), XP 130d (64+16+50)
- LaunchCount Offsets: Vista 202d (128+16+58), XP 138d (64+16+58)
The string section always starts with ‘CCM_RecentlyUsedApps’ and is followed by the double 0x00 separator. If there are 4 bytes of 0x00 following, then the next string field is null. If there are 6 bytes of 0x00, then the next 2 string fields are null. Follow the pattern?
The string properties are listed in the following order:
- ClassName (always “CCM_RecentlyUsedApps”)
- AdditionalProductCodes
- CompanyName
- ExplorerFilename
- FileDescription
- FilePropertiesHash
- FileVersion
- FolderPath
- LastUsedTime
- LastUsername
- MsiDisplayName
- MsiPublisher
- MsiVersion
- OriginalFilename
- ProductCode
- ProductName
- ProductVersion
- SoftwarePropertiesHash
There will only be a single 0x00 at the very end of the record. Wasn’t that easy?
New Python Tool
After I determined these structures, I was chatting with Willi Ballenthin since he was involved in the research of the database structure. He said something like “that tool sounds pretty neat” and then followed up saying “possibly similar to this” and pointed me to a blog post by David Pany at FireEye.
https://www.fireeye.com/blog/threat-research/2016/12/do_you_see_what_icc.html
Sure enough, David beat me to it with a python script to search for the classname hashes and parse the record structure. The good news is that we arrived at the same basic approach and record structures. Validation is always nice. His python script is on GitHub here:
https://github.com/davidpany/WMI_Forensics/blob/master/CCM_RUA_Finder.py
I have had some trouble running this python script against my systems, but I haven’t spent the time to determine the cause. The output is a CSV file, but I don’t have any screenshots to show because of the errors I ran into.
New EnScript Tool
I decided to write this approach in EnScript. My cases have involved upwards of 500 systems for analysis. Using a python based approach would force me to either extract all those files, or use a mounting or parsing solution to expose the files. By using EnScript in EnCase v7 or v8, I can run the EnScript over all system images with one pass. I was able to successfully do this in testing on a recent case with 73 systems in the same case. EnCase proved to be a powerful tool in this specific scenario.
The EnScript starts off with a GUI to give you the option of running against all files in the case or a smaller subset designated by a blue check or tag selection.
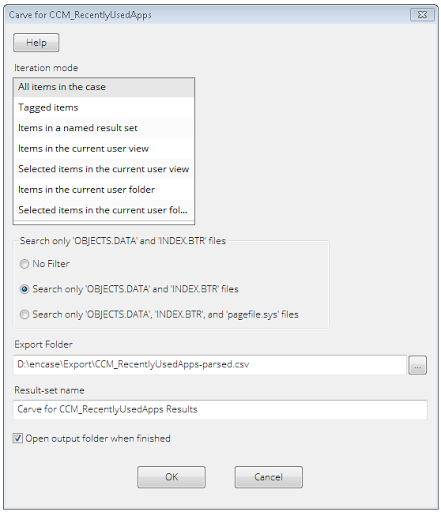
I found records existing in OBJECTS.DATA and INDEX.BTR files. Some seem to be in areas of the file that have been deallocated from the active records of the database. Additionally, I have found quite a large number of records in the PAGEFILE.SYS file as well. You will see a selection option in the GUI for these common filenames.
The output of this EnScript is a CSV file. It includes a few columns in addition to the properties that were parsed from the records: evidence filename to indicate the system source, item path to show which file it was found in, and file offset to manually validate the data later if needed.
I encourage you to use Excel’s data deduplication function since I ran into a number of bugs in EnCase trying to make this EnScript work. There are some hacky workarounds in the code currently. Dedupe on all columns except item path and file offset. This will remove dupes that are found in both pagefile.sys and objects.data files.
I suspect we might be able to pull some of these records from unallocated clusters, but I haven’t found any there yet. Please let me know if you do!
You can grab the latest version of the EnScript on GitHub:
https://github.com/JamesHabben/ccm-rua-enscript
James Habben
tags: Prefetch