
4n6ir.com
Show and Search for NTFS Owner in EnCase
by James Habben
Windows can be such a weird and wonderful thing, both at the same time. In a digital forensics sense, the artifacts left behind from user activity often give me delight. The same artifacts can often leave me scratching my head about why it exists in the first place. One of those features is the owner property in the NTFS file permissions.
User Activity
When a user creates a file, Windows typically drops that user account as the named owner of that file in the NTFS permissions. Sometimes, it assigns a local user group (say administrators) instead of a specific user, though I do not know the details of conditions surrounding that difference. Not the point of this post anyways.
To steps to see the owner of a file will vary a bit depending on the version of Windows you are using. The artifact itself is not affected by the version.
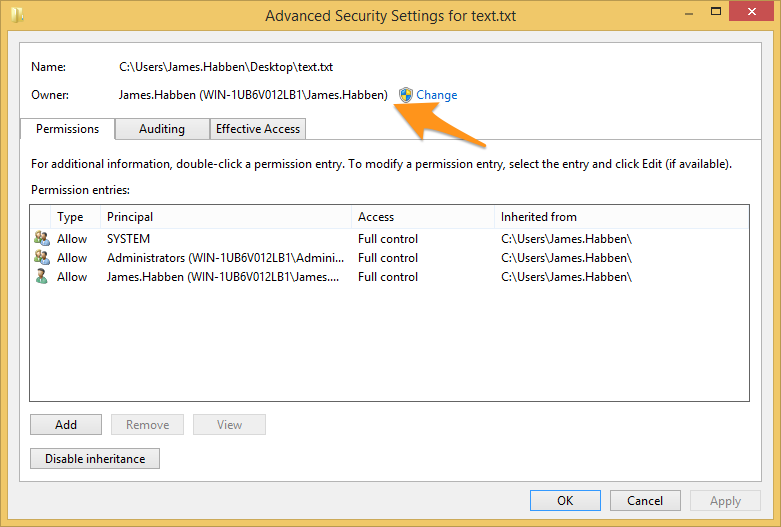
In Windows 8, right click on the file and choose properties. At the top, switch from the general tab to the security tab. Then, click the advanced button at the bottom. A new window will show, and the owner is listed near the top.
Showing in EnCase
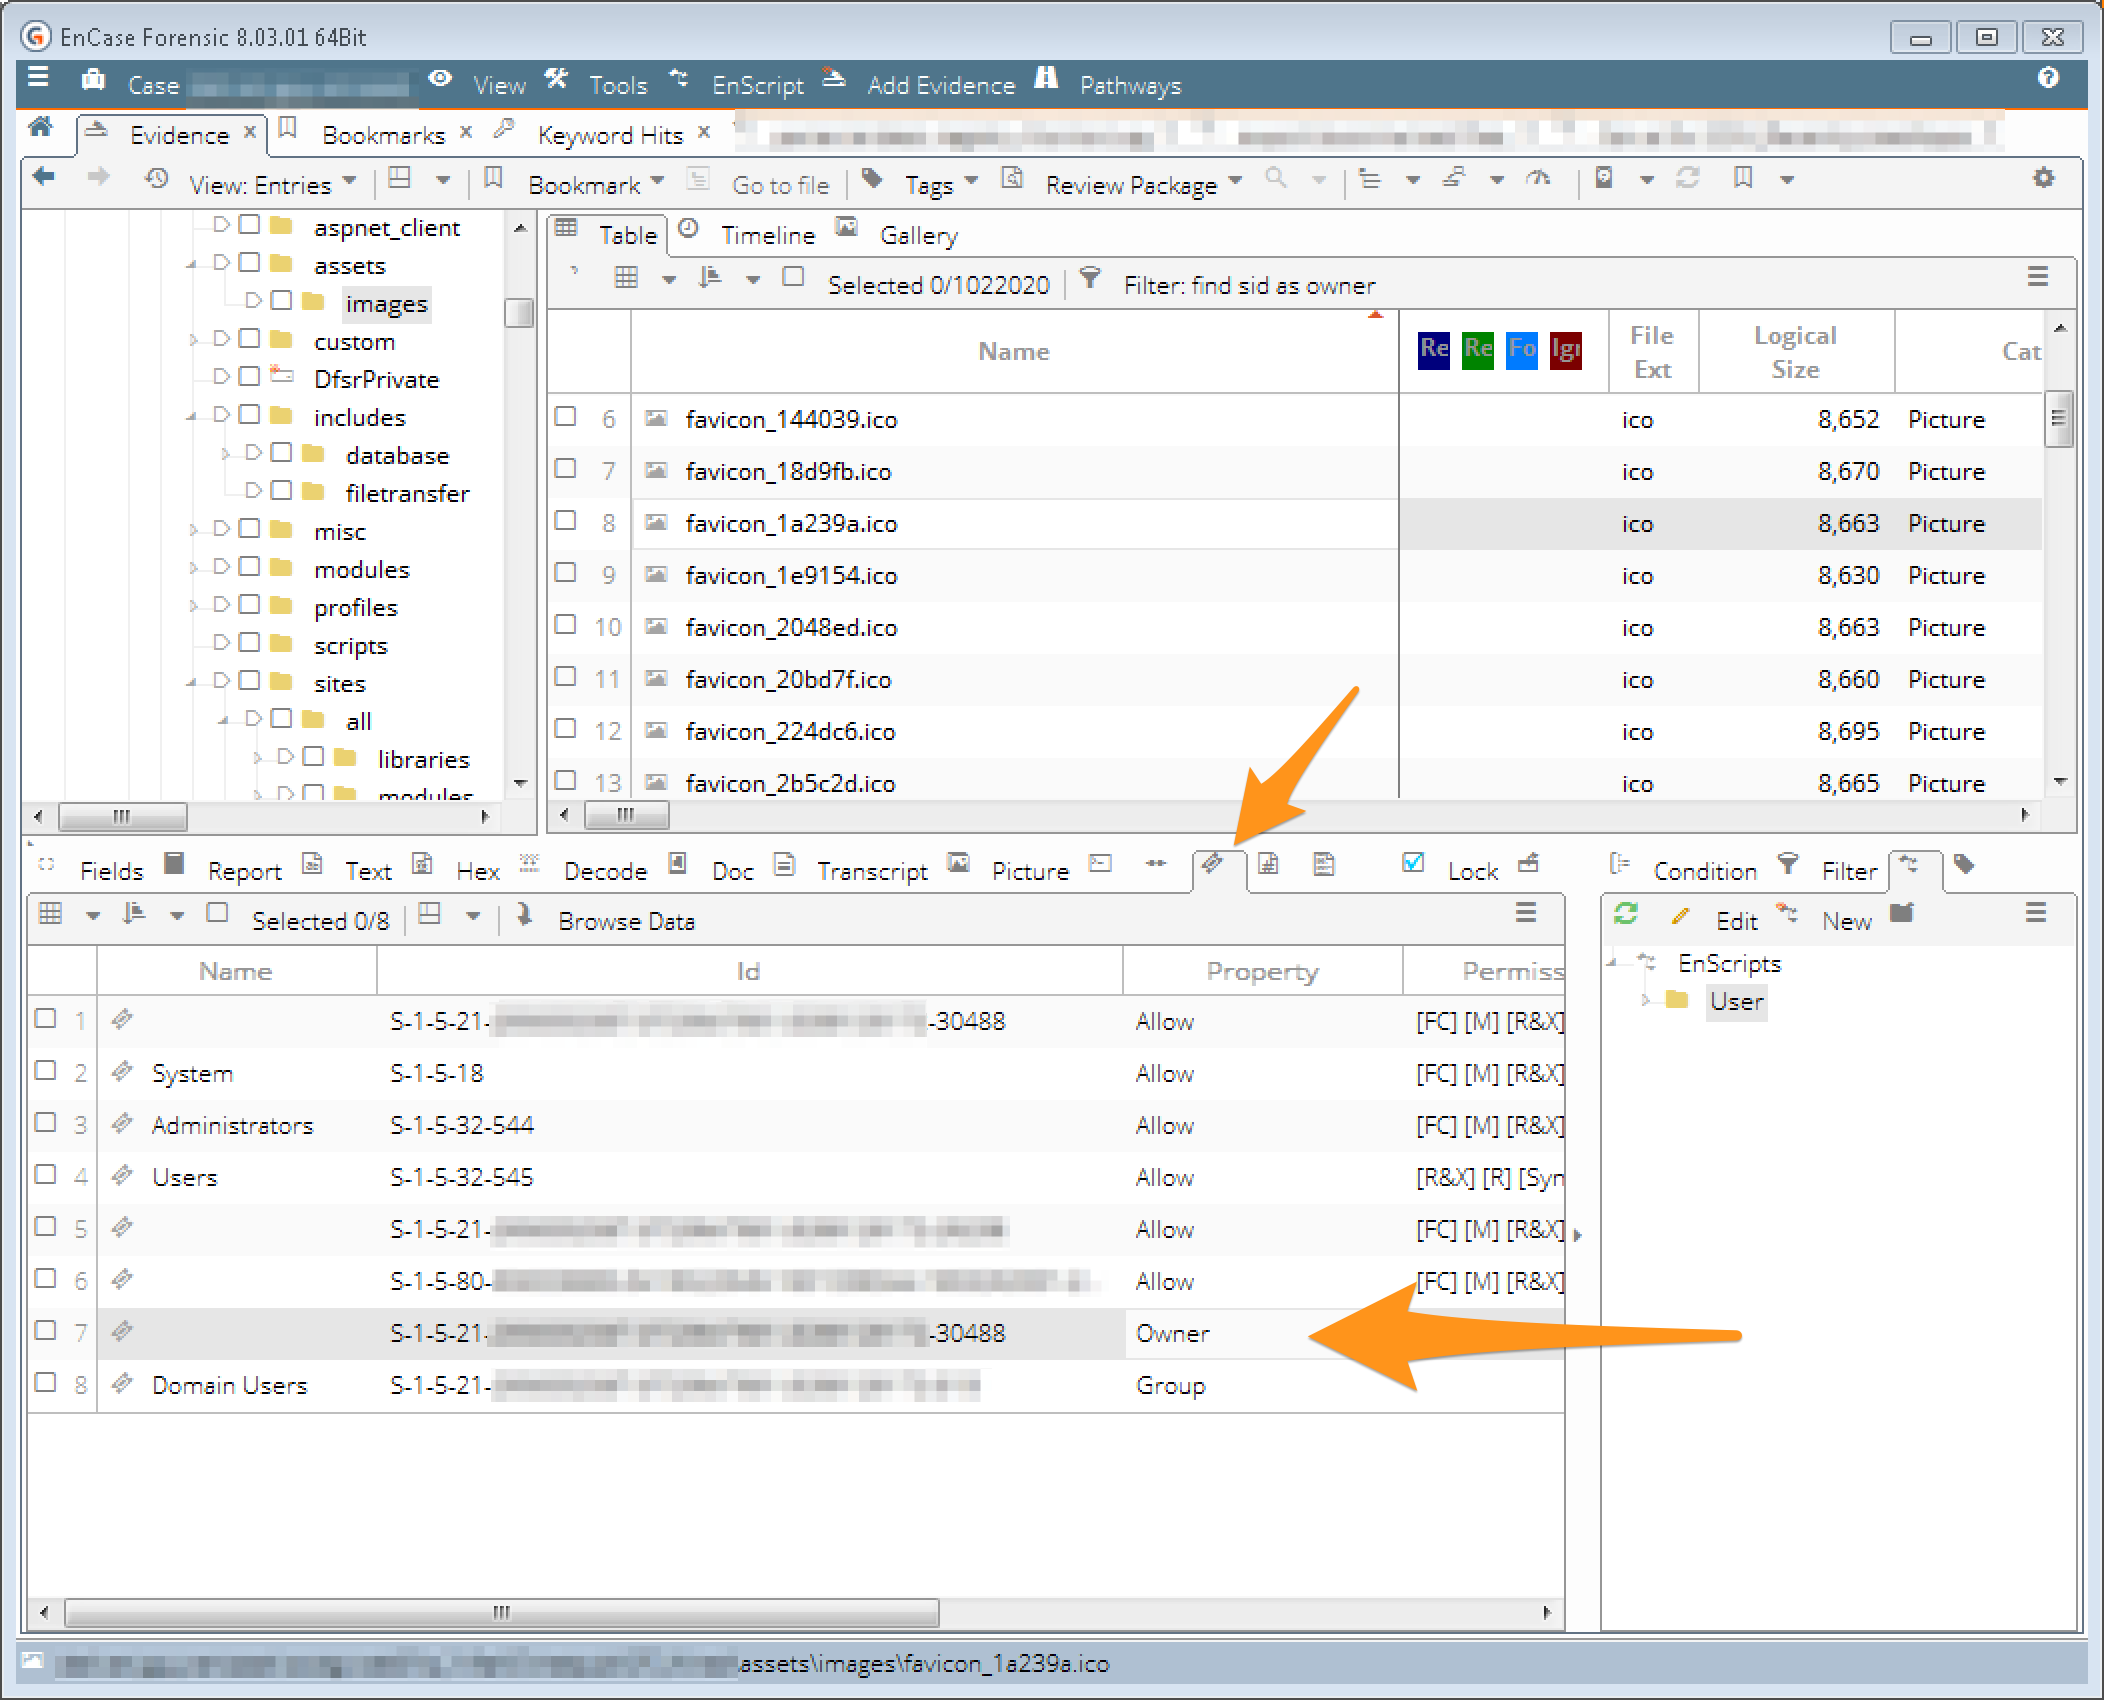
To see the very same data in EnCase is fairly straight forward. Choose a file in the table pane. Then in the view (lower) pane, you will see a tab called permissions. The view will switch and list one of the records as the owner.
Forensic Usefulness
As you might have noticed, the file system in the above image looks a lot like a CMS package on a web server. If you did, great eye! Web servers use a specific account to access and store content for the anonymous users that make requests. This user account is assigned permissions on the file system to prevent that anonymous user from going where they aren’t allowed.
Some web applications allow those anonymous users to upload files to be used by the web application or even submitted to the company for some purpose. Because the web server user account is used for these interactions, you will find that user account as the owner for any files that were uploaded through the web application.
In the event of a web server compromise, this web server user account is often the early stages of attackers interacting with the computer. Attackers want to get their files into that file system to allow more control. These are called web shells and offer nearly identical functionality to the typical remote access tool category, only through a website interface.
What if we could get EnCase to display all files that are owned by this web server user account? I am glad you asked!
Filtering in EnCase
EnCase offers conditions and filters to limit the files shown on screen. Simply put, conditions are easier to create (point and click) while filters are hard (type EnScript code). I will show you the steps to create a condition that will show you only the files with the prompted value in the owner field. This can be done in EnCase v5 through v8 and the windows will look nearly identical.
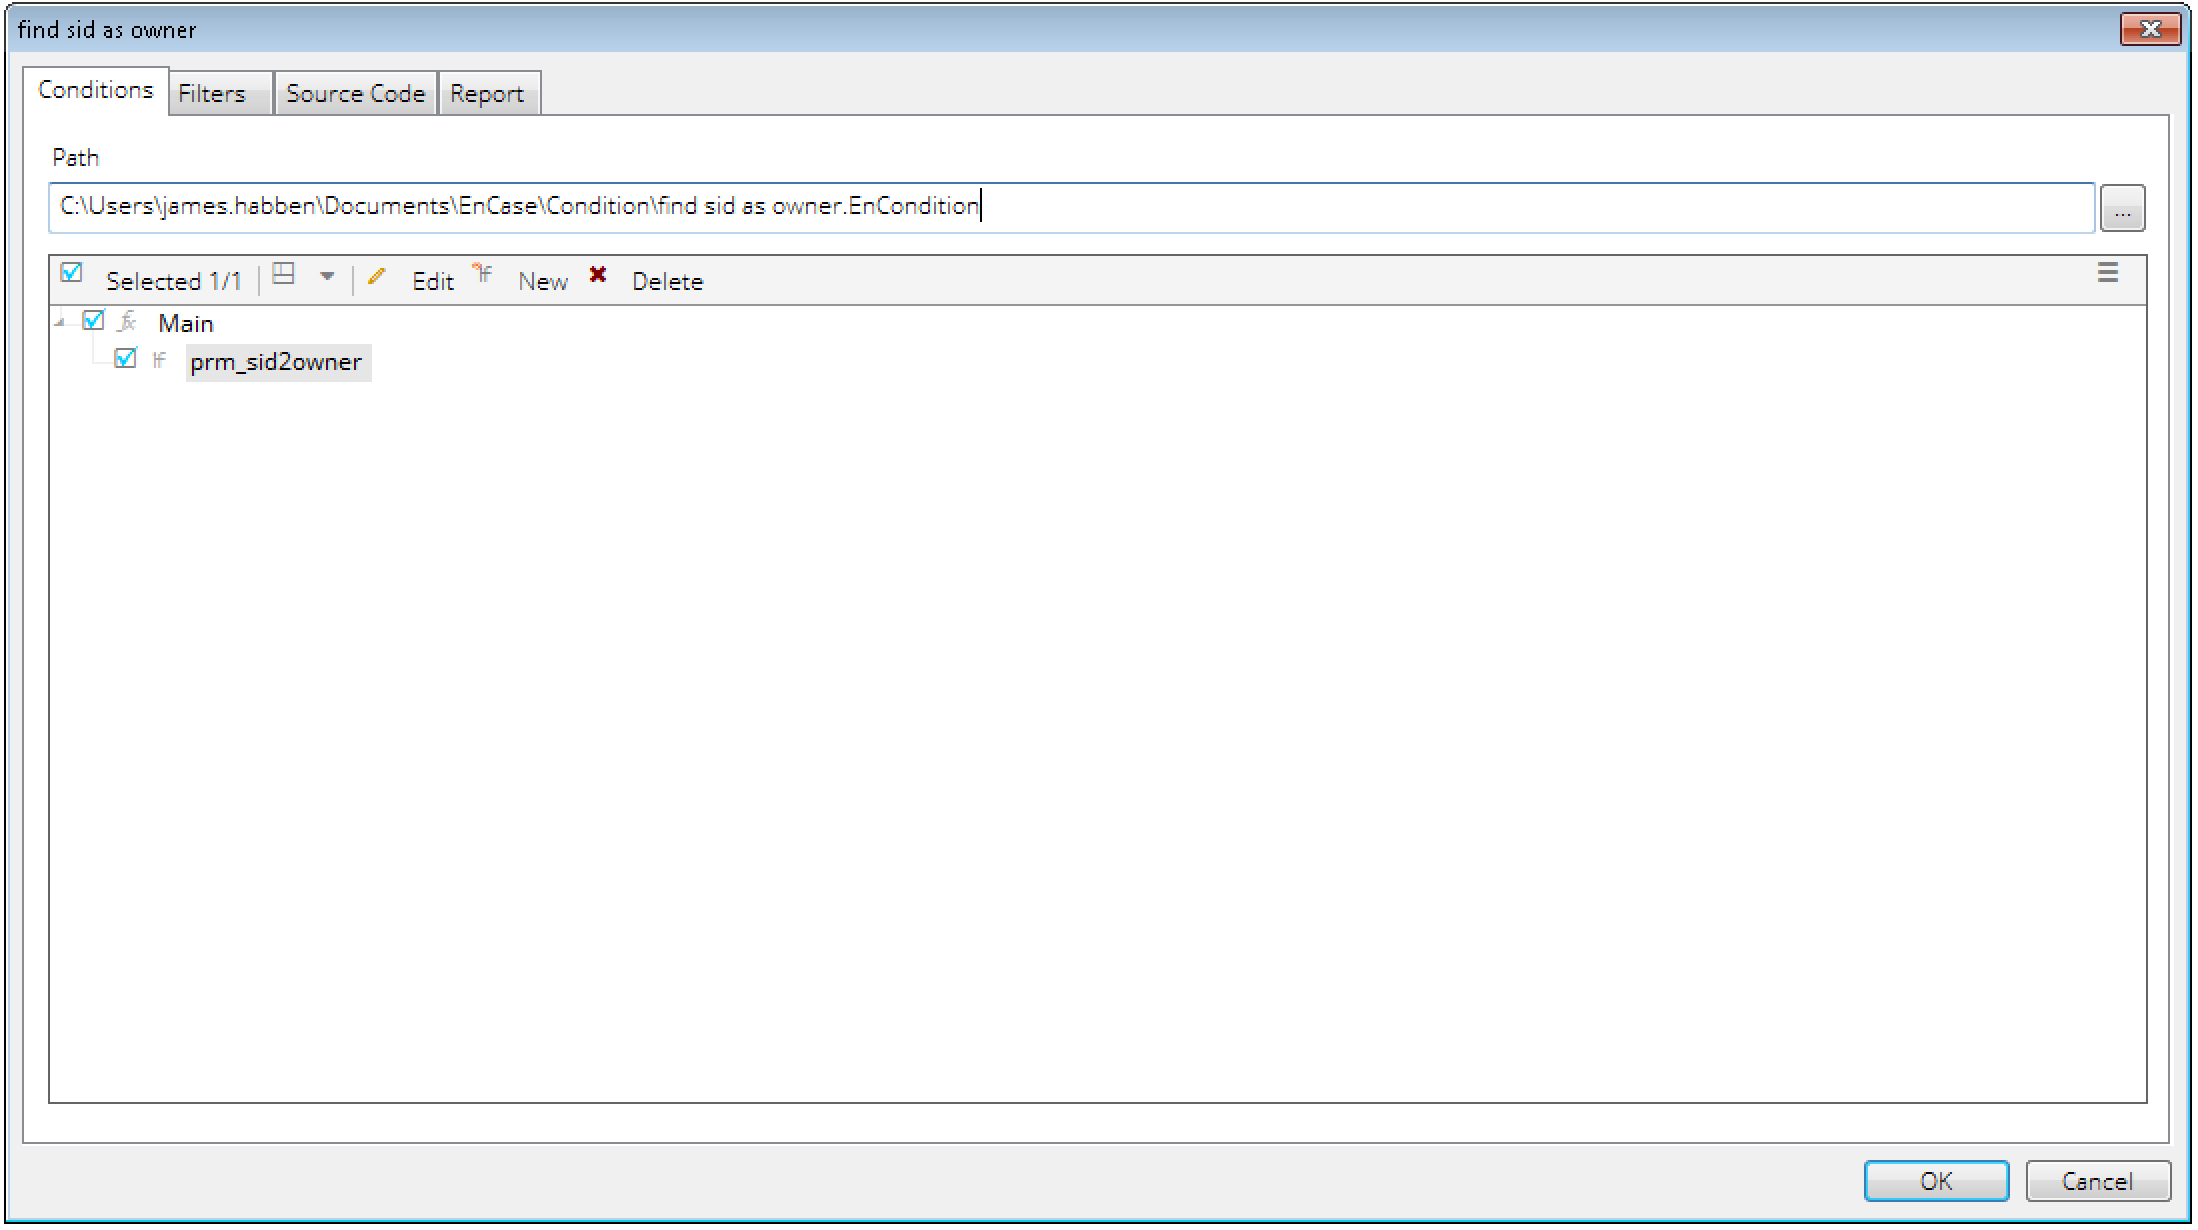
First step, find the conditions tab and create a new one. I name mine “find sid as owner”, but you can call it whatever makes sense to you.
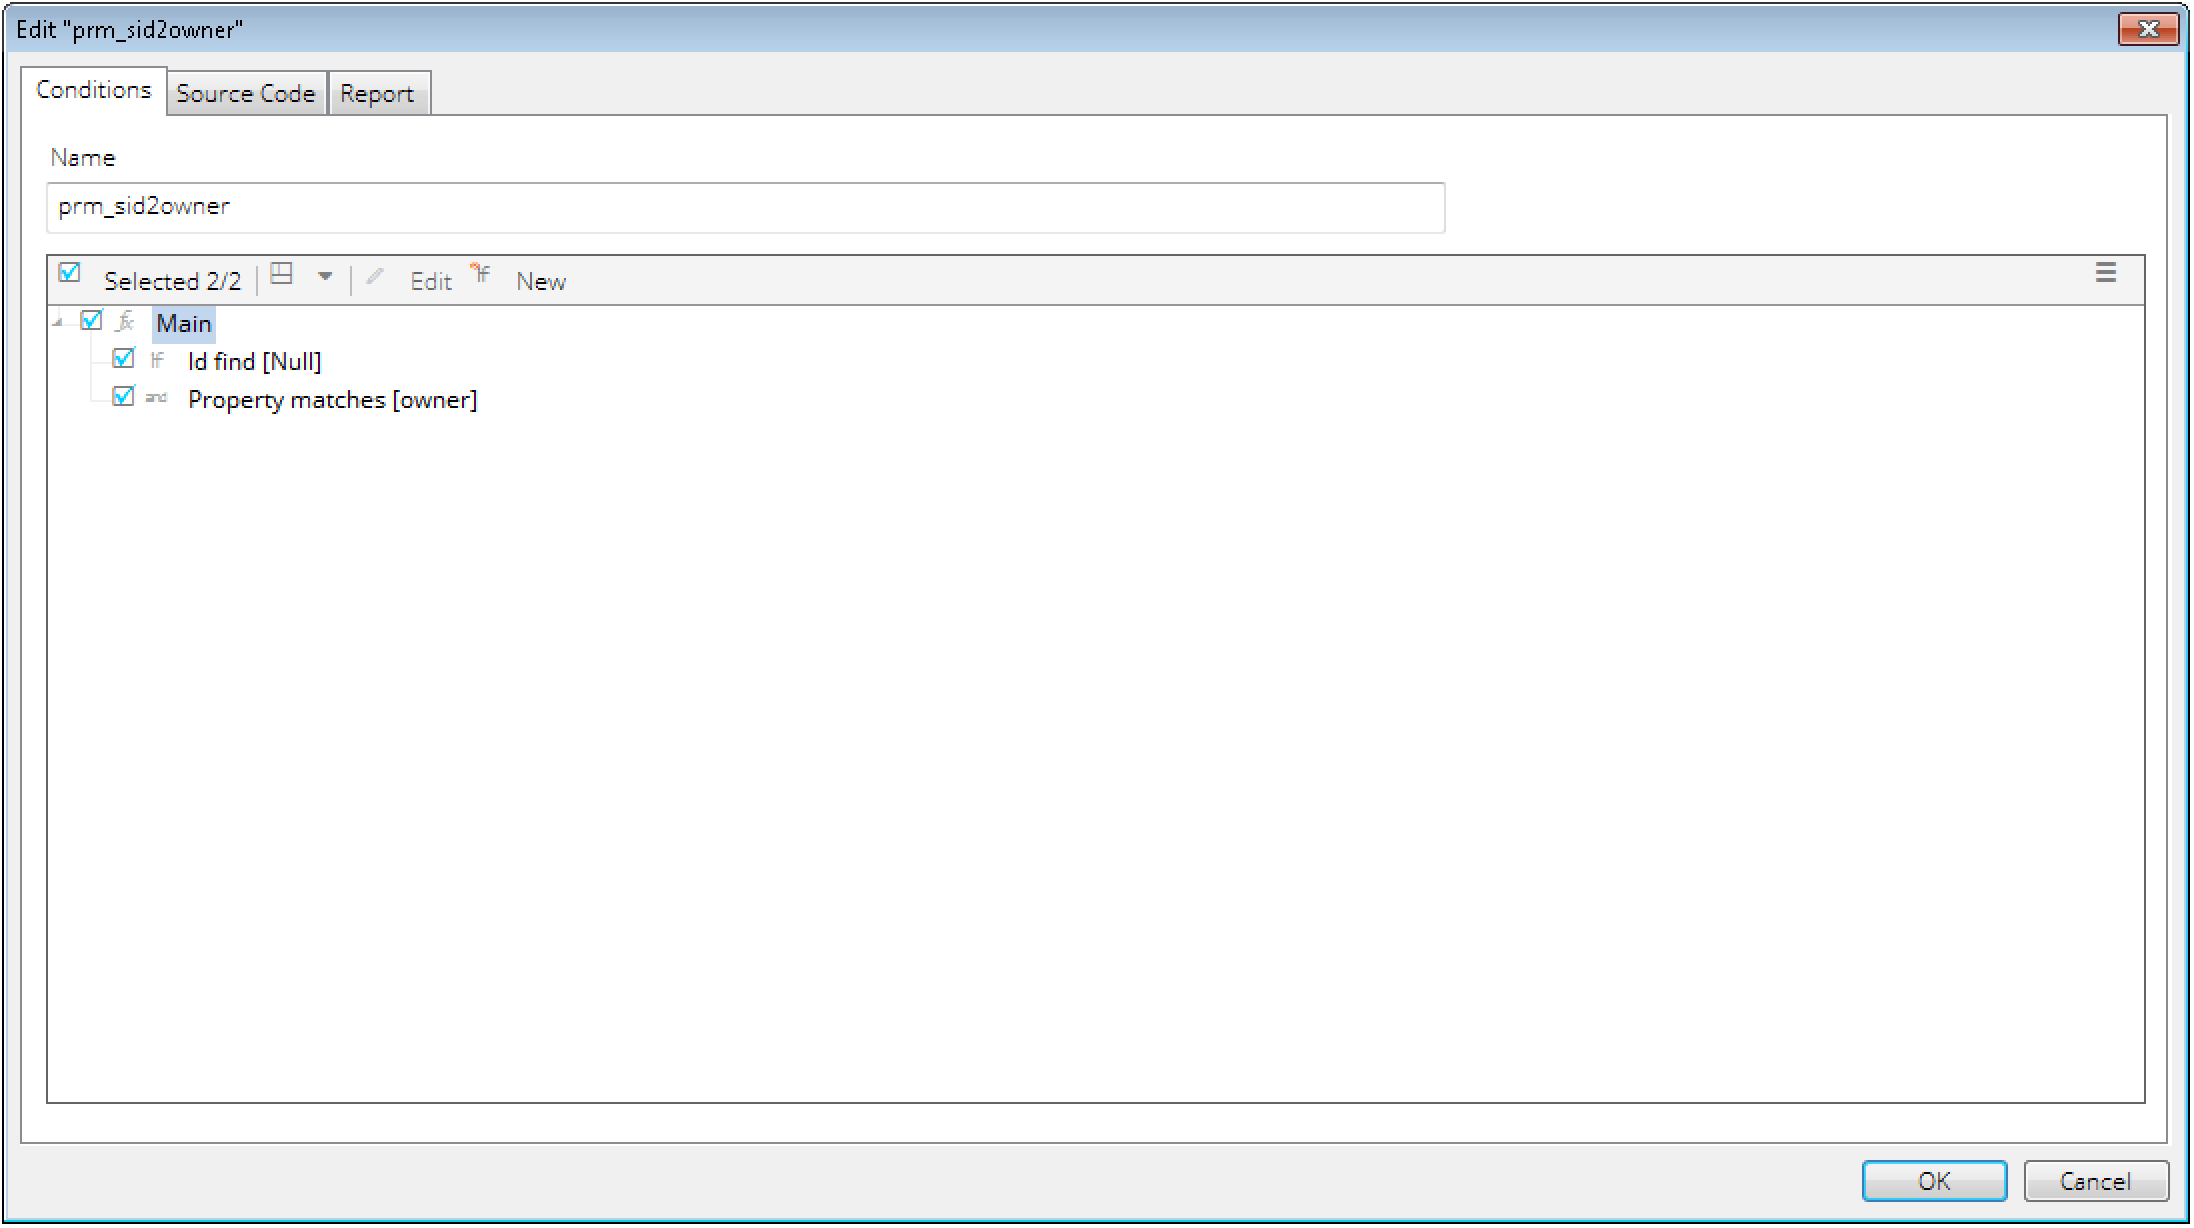
Next, we have to create a mini-filter before the condition can function. Go to the filters tab, then double click on the PermissionRoot option on the right. Name it “prm_sid2owner”.
Add a new term. Choose ID in the properties list, choose find in the operators list, leave the value box empty, and check the ‘prompt for value’ checkbox. Click ok.
Add another new term. Choose property in the properties list, choose matches in the operators list, type ‘owner’ in the value box. Click ok.
Now right click on the ‘main’ at the top of the tree and choose change logic. Click ok. You should see ‘prm_sid2owner’ listed on the left.
Now, go back the conditions and add a new term. At the bottom of the property list, you will find the mini-filter we just created.
Now you can apply this to your case. You can supply a fill SID value or a partial. You can also give a list of SID values to search for if you were looking for multiple users.
Hope this helps! Reach out with any questions or comments.
James Habben
tags: EnCase